Windshield wiper issues - Glassics

A place to gather windshield wiper issues.

From Joel's (the builder of Glassics and Replicars)  recollection in 2006:

GENERAL

Wipers were from a Scout 800A that mounted on the top of the windshield.  When we went to the Ford (V-8) it didn't have a double action fuel pump, so when you stepped on the gas the wipers stopped, so we started adding a vacuum tank (the tank was a Ford item)  ..about a quart in size to give the extra source while under (short) acceleration - then just let up for an instant and the tank re-loaded for another (short) acceleration  Glassics had the vacuum wipers throughout all production, as I recall...... 

Then (beginning with Replicars in 1976) we went to the Lucas and the rest is history...

Scroll down for 1978 info.

1974 Wiper info

This info was sent in February, 2012 by
Larry S. (car 918
Kandra@flash.net
931-823-0222

Windshield wiper Glassic Generation two. (These are the Ford engine cars ranging from about VIN 431 TO 1211 and years 1971-1974) Reminder: running wiper on dry windshield can scratch the windshield and is harder for the motor then a wet windshield.


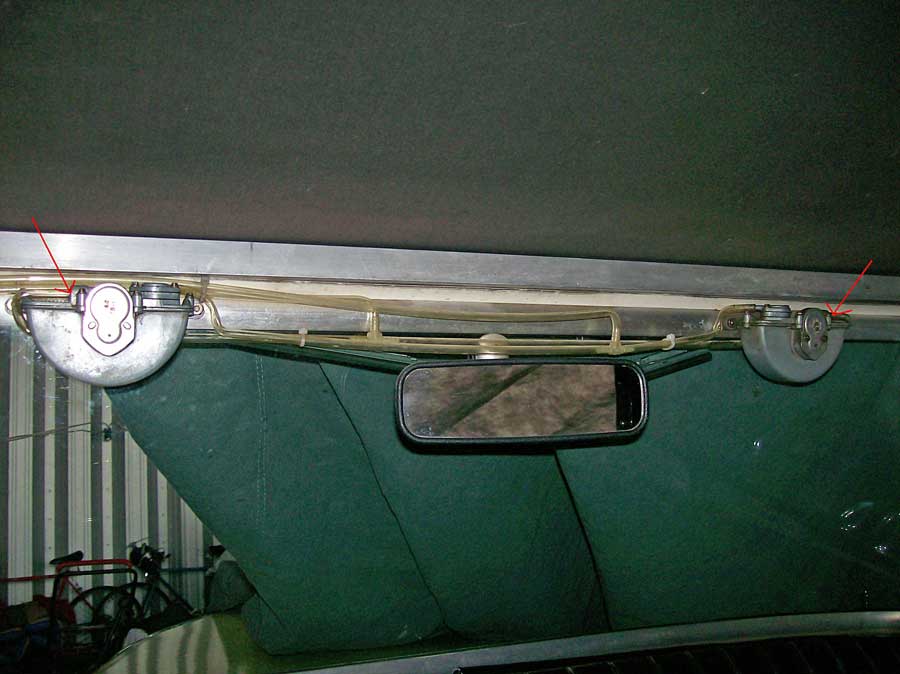
Roadster R918 has Trico brand Vacuum Wiper Motors (left and right are Not the same). I have seen several different Trico Vacuum motors so buying a Rebuild kit would be a little bit of a gamble making sure you got the correct one.

Wiper Blades are 7 3/4" long and only available through Model A part sites.


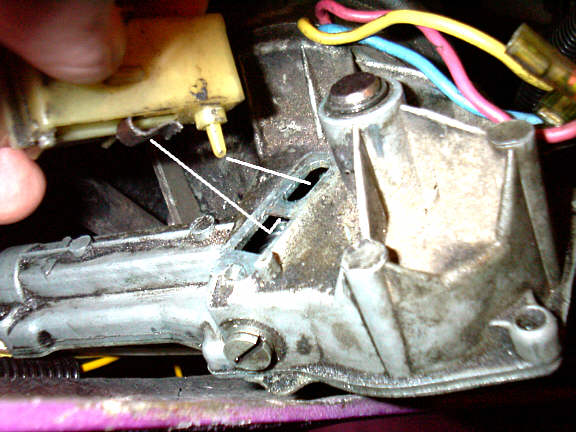
If the motor doesn't run or is very slow try A little WD40 or Transmission fluid, it can restore the motor sometimes. Just put a Small amount into the motor where the vacuum hose Connects (NOT in the hose). It is the hose connection closest to the door (left on Driver side and right on Passenger side). (pic below)

Make sure to work the wiper shaft back and forth several times. Then clean excess lubricant before reconnecting hoses.


It that doesn't help replace or check the Vacuum Hoses for leaks.


If you want to remove the motor:

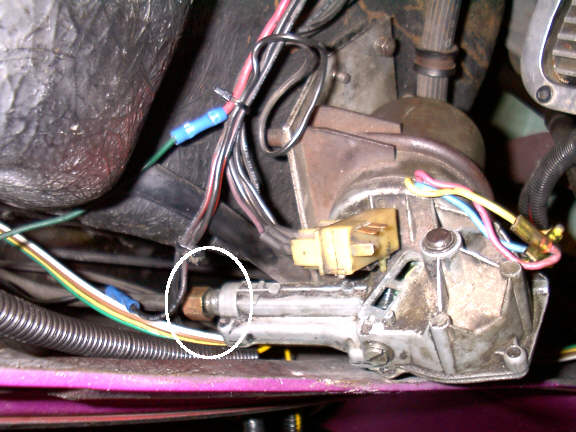
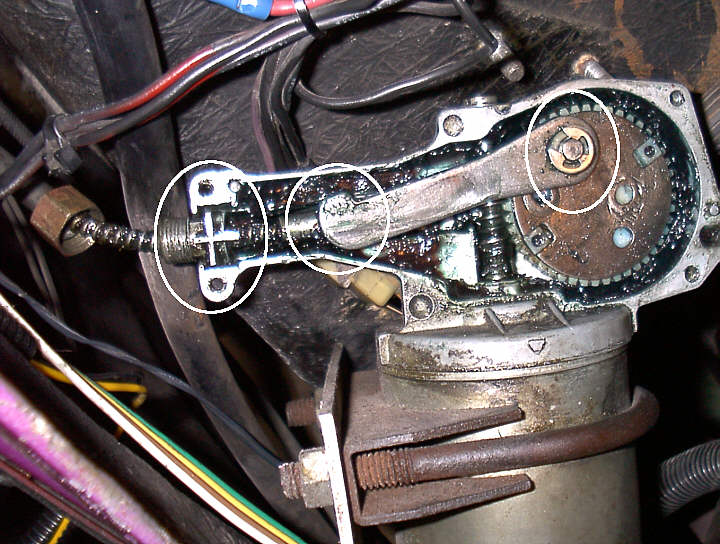
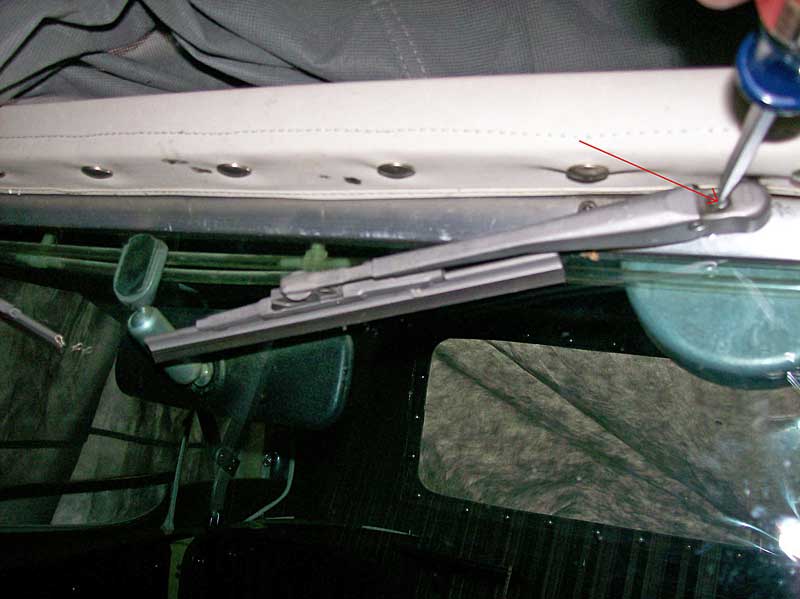
The wiper blade on R918 is held on a knurled cam by a screw accessible on front of wiper blade assy. (pic below)

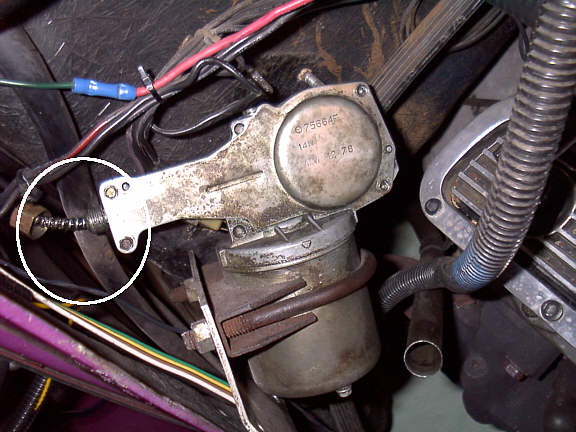
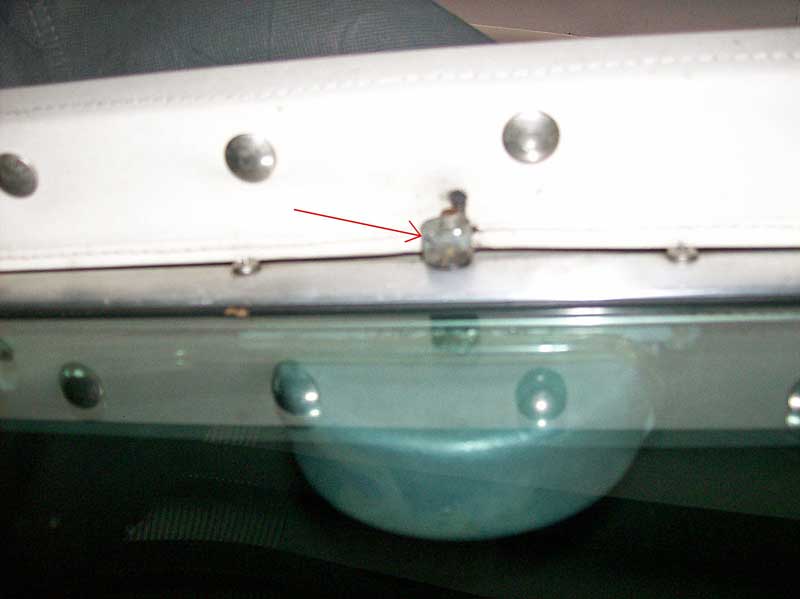
The knurled cam is held on Motor Shaft by a Set Screw (or two).(pic below)

The Motor is held in place with two bolts through the windshield frame along with lock washer and nut.

When you reinstall the Wiper Blade be sure to turn the Vacuum Motor Shaft to home (starting) position before positioning the Blade for reattachment.

The motor can be replaced by an Electric Motor. Several universal types are available. They would mount by a nut on the drive shaft assembly. The current mounting holes would need to be plugged, switch replaced, and wires ran. I would suggest buying as a assembly with Motor, Blade, and Blade Arm. Some Motors have a built-in switch.

As of 2/2012, Larry advises that http://www.wiperman.com/ rebuilds Trico Vacuum Wiper Moters (currently $99. + shipping)


1978 Wiper assembly.

1978 Phaeton. Car 1254. My windshield wipers came to rest
 at the wrong end of the cycle. They were not
 flat against the cowl, they were pretty much upright. 

Joel says that this was made by Lucas for various British cars. The metal plate (hard to see when in the car -- see the third picture) has the marks as follows

a circle with a Y in it, or a three legged steering wheel - and the numbers 75664F also 14 W and 12 V also 12 78


Removing wiper motor and gear assembly - first, disconnect wires and pull out electric box.
The pokey thing on the yellow electric connector is a switch. When power is turned off to the wipers, they continue to run until a bump on the gear inside pushes that pin up into the box and shuts off the power.
The brass clip holds the box in place. To remove the box, pull it toward you and up.


The brass colored cap holds the cable into the end of the unit. That needs to be unscrewed so that you have some play to remove the assembly and the holding bracket from the firewall. You will need to flip the unit over to get to the back side of the gear box.


These are the wire numbers for the wires going into the wiper switch. I could not see any markings on my wires, but I noticed that # 57 looks purple on my car. Joel said that originally the numbers were on the wire connector ends.


4 bolts held on the bracket that held the motor and gear assembly. The circle shows where I pulled on the cable to get room to flip the unit over .I next removed the back plate. The two hex head screws inside the circle are still attached. the two on the right side I have already removed.


removing that cover reveals the guts of the gear part. The left circle shows the + sign piece - it is a retainer that lifts out and hold the threaded part in place. The center circle is one end of the rod that pulls and then pushes the cable. It just lays in a round hole at the end of the cable - you can't see that end because it is underneath. The right circle is the nub on the gear that pivots and pulls and pushes as the gear goes around. It is held in place with that C shaped clamp on washer. Unclip it and the piece between the right and center circle just lifts off.


Finally you can remove the motor and gears from t he car. #1 is the plastic gear. On the back of that round gear is a bump that pushes the switch to shut off (park) the wipers at the right spot. #2 is the pin that the arm slips over. It reminds me of the front wheel of a locomotive. To the left of #3 is the worm gear from the motor. It spins around and connects to the plastic gear.

In MY case, the metal plate on top of the plastic gear was installed backwards (see the two square notches?) I lifted the metal plate off of the plastic gear and rotated it 180 degrees. Go back to the first picture and you will see the other end of that metal plate as the shaft end in the upper right corner. It also had a c shaped washer to hold it in place. The metal part was on a rod that went through to the other side -- the retaining clip had to be removed so I could lift up the metal enough to clear the two alignment bumps on the plastic gear enough to rotate it.

I probably have the ONLY car with that goofy problem.

ADJUSTMENT: The windshield wiper arms are push-on. I removed the arms, turned the wipers off, so that the round peg that the arms sit on went to their "park" position, then I merely put the arms on so that they would be just above the frame of the windshield bottom.